
An Introduction to Bicycle touring
An introduction to
Bicycle Touring
Bicycle touring (also referred to as cyclotouring) can be one of the most enjoyable and rewarding aspects of cycling. There is nothing quite like getting on your bike and simply heading out for a few days. Not only will this heighten your sense of adventure and independence, it opens up a range of new possibilities for vacations and weekend-get-aways.
Before going into more detail, it is worth noting that there are basically three types of bicycle touring which can be summarized as follows:
- Fully Supported Touring. With this kind of touring an organized group is supported by a motor vehicle which carries supplies and transports everyone’s luggage to the next destination. In most cases the group will be eating in restaurants and staying at hotels or bed & breakfasts (B&Bs). Bikes do not have to be loaded with any baggage, but this type of touring can be quite expensive.
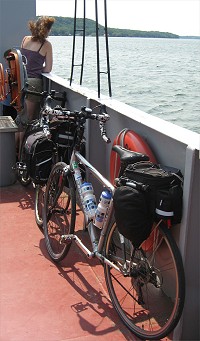
Touring bikes on a ferry.
- Fully Loaded Touring. Cyclists have to carry everything needed to be self-sufficient, including clothing, parts and tools for emergency repairs, food, cooking accessories, tent, and camping equipment. They usually prepare their own food and camp out. Bicycles are heavily loaded, but this is the least expensive type of touring, and there’s no need to travel with an organized group.
- Lightweight Touring. Cyclists travel with essential clothing, a few basic items for emergency repairs, and a credit card to eat at restaurants and stay at hotels or B&Bs. (It’s often called “credit card touring”.) Baggage is kept to a minimum, so bikes will not feel heavily loaded. There is no need to be part of an organized group, and individuals are able to control costs by deciding where to stay and eat.
Of the three, lightweight touring is probably the best suited for people who are relatively new to this type of cycling. It is not nearly as demanding as fully loaded touring, and unlike touring in an organized group, it allows people to set their own pace and pick their own destinations.
As a result, this article is aimed at people who want to learn more about lightweight touring. It also assumes that you have done a fair amount of local riding, are sufficiently fit, and are capable of cycling reasonably long distances. If this isn’t the case, you may want to check out “Getting Started – a Primer for Born-Again Cyclists“.
Planning your first tour
It’s a good idea to invest a little extra time in planning and organizing your first few bicycle tours. Unless you are used to cycling really long distances, covering 40 to 60 kilometres a day would seem to be a good proposition for the first few rides. (People who do a lot of touring will sometimes ride 80 to 160 km a day.) When you do feel up to pedaling a little further, schedule a long mid-day rest period during which you can enjoy a leisurely lunch. As a destination, you’ll probably want to pick an interesting town that offers a range of tourist facilities. Avoid getting stuck in a cheap motel in the middle of nowhere.
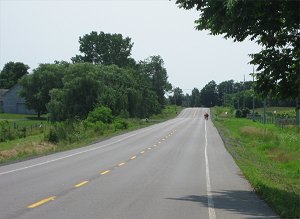
An example of a nice quiet road with a good paved shoulder.
You may want to give some thought to your departure and arrival times. If it is going to be a hot sunny day, consider leaving early in the morning when temperatures will be slightly cooler. Even when leaving later, many cyclists like to get to their destination early enough in the afternoon to take a shower, wash their bicycle clothes, and relax a bit before supper. It is also very nice to have time to savour a glass of wine or a cold beer on an outdoor terrace that happens to overlook a local body of water. It’s one of the great ways to celebrate a beautiful summer afternoon after completing a day’s ride.
Deciding on a good itinerary (route planning)
In a perfect world, it would always be possible to map out a route to a particular destination that would run exclusively on bicycle paths, bicycle lanes, paved shoulders, or quiet country roads. In reality, this is not always possible, and there will be times when your plans may have to include riding short distances on a fairly busy roads that have no bicycle lanes or paved shoulders. The challenge is to keep this to a minimum, and to avoid unexpected situations where you get caught having to ride a long stretch under difficult circumstances. Needless to say, you’ll also want to stay away from gravel roads.
So how can you be sure that you are picking the right roads when planning your route? There is no foolproof answer to this question, and it’s a matter of doing some research. Web sites like this one and others (see the links below) can give a heads-up on what to expect with certain routes. Be careful when reading people’s recommendations. Experienced cyclists who have done a lot of touring on busy roads often suggest routes that may not be suitable for someone used to riding on bicycle trails and lanes.
Google maps can be used to find bike paths (in dark green) and bike lanes (in light green). To see them, go Google maps, click on the menu icon (3 horizontal bars) link in the upper left corner, and then click on the bicycle icon. But again, you have to be careful because in rural areas, Goggle maps often identifies paths that are really rough trails that are only suitable mountain bikes. In addition, there is a Strava map that shows some of the more popular cycling routes throughout the world. The brighter the line, the more popular the route.
You should also get in the habit of asking around about what might be a good route and destination for bicycle touring. Strike up a conversation at places where cyclists tend to congregate such as rest areas, water fountains, lookouts, snack bars, and so on. Most cyclists are very eager to share their discoveries about good cycling routes.
Plan with Google’s “street view”
Needless to say, the “street view” feature on Goggle Maps can be very handy for planning a tour. Drag the little human symbol in the botton right corner onto a road on the map, and you’ll get an instant view of what things look like at that spot. You’ll be able to scroll around the image to change your perspective, and this makes it easy to see if the road has a bicycle lane or paved shoulder. You should do this at several points on your proposed route to confirm that the bike lane or paved shoulder runs the entire length of the road you are looking at. The only problem with Google’s street view feature is that outside of cities and larger towns, it is sometimes available only for major roads and highways (the very ones you want to avoid).
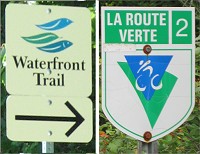
Signs for Ontario’s “Waterfront Trail” and Quebec’s “Route Verte”.
In Ontario, the “Waterfront Trail” runs along the north shore of the St. Lawrence River and Lake Ontario, and is supposed to allow cyclists to ride all the way from the Quebec/Ontario border to the Niagara Peninsula on bike paths & lanes, paved shoulders, and quiet residential streets. Although it has gotten off to an impressive start, the “Waterfront Trail” is still a work-in-progress. There are many areas where you’ll have to ride on busy roads without the benefit of a bike lane or paved shoulder. (Note that this 900 km trail is being improved every year.)
Where to go (for your first tours)
There are a number of excellent destinations in the Ottawa area for those who would like to try bicycle touring for the first time.
One of these is Carleton Place. Depending on your departure point, it will be a 45 to 55 kilometres ride (one way) to this small town located just west of Ottawa. What makes Carleton Place unique is that you can cycle all the way there on bike paths and trails. As an added bonus, the ride takes place over essentially flat terrain. Carleton Place has an interesting downtown area, an old inn, several B&Bs, and a reasonably good selection of bars and restaurants. This includes a pub with the requisite outdoor terrace which overlooks the Mississippi River. A return trip to Carleton Place with an overnight stay would make a great weekend get-away.
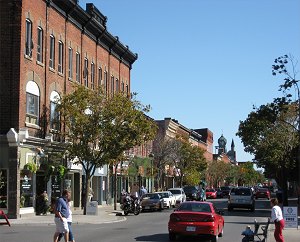
Carleton Place has an interesting downtown area.
Wakefield is located north of Ottawa on the Gatineau River, and this picturesque little town attracts a good number of tourist throughout the year. In terms of facilities, it has an old mill that has been refurbished as an inn, a couple of B&Bs, and several bars, restaurants and boutiques. Although the ride to Wakefield from downtown Ottawa ride is relatively short (about 40 km), there are a few areas where you will have to do a bit of hill climbing. For the first half of the ride you’ll be on bike paths, paved shoulders, or parkways in Gatineau Park. In the second half, you’ll be cycling on back roads that do not have a paved shoulder. Although there’s a steady trickle of cars on these roads, they are not too busy.
If you don’t mind a two hour drive in your car, you can also head over to the “P’tit train du Nord“. This 200 kilometres bike trail is located in the Laurentians northwest of Montreal, and is tailor made for anyone planning their first multi-day bicycle ride. Although it winds its way through mountains, it is built on an old railroad line, so the trail is surprisingly flat (there are a few slopes, but nothing too serious). The P’tit train du Nord trail passes by almost a dozen tourist towns, so you will never be far from B&Bs, hotels, restaurants, and other facilities. If you don’t want to ride it both ways, you can always take one of the special shuttle buses to transport you and your bike back to your starting point (i.e. where you parked your car).
Bikes and equipment for touring
Unless you are doing fully-loaded touring, or planning to ride super long distances, most types of bicycles suitable for road use can be used for touring. This includes everything from hybrids to purebred road bikes which are often associated with racing. If you want to get picky, your best choice will be a dedicated touring bike, but performance hybrids and racing-type road bikes built with a relaxed geometry are almost as good for lightweight touring. For more details about the different of types of bikes, see “Choosing the right bike for you“.
Points to consider
|
A run-of-the-mill aluminum rack that mounts over the rear wheel is all you really need for lightweight touring. Ideally, your bike will have braze-ons (eyelets or mounting points) for attaching the rack directly to the bicycle frame. If not, a good bicycle mechanic should be able to come up with an arrangement and hardware to securely mount a rack. This may only be a temporary adaptation, but it should be good enough for one or two weeks of lightweight touring. As an alternative, some people may be tempted to use a backpack, but this is not recommended. As a general rule, the bike should carry the load, not the rider.
Pannier bags are what you’ll need to carry your clothes and other supplies. They are sold as a pair and the bags clip on both side of the rear rack. They are available in a wide range of prices and a variety sizes. For occasional lightweight touring, you’ll do fine with medium quality bags. If you are going to be using both panniers exclusively for yourself, look for smallish bags. A couple sharing the use of one pair of panniers should be okay with small to medium size bags with total capacity of about 20 to 25 litres (total volume for the pair). Whatever the case, resist the temptation to buy overly large pannier bags. With large bags, you’ll find that your list of so-called essential items will needlessly expand to fill the extra volume available (and your bike will start to feel heavily loaded).
Tires that are 32mm wide are well suited for touring because they offer reasonably good performance over a variety of surfaces, and are wide enough to dampen out road buzz. 28mm tires are almost as good. Although it is very common to find people touring on narrower tires (23mm & 25mm widths), these will be a touch less comfortable when riding on pavement with a haggard surface, or hard-packed crushed stone trails that might be little more coarse than usual. Tires wider than 32 mm generate rolling resistance that might become noticeable on longer rides. Remember that good quality tires that are puncture resistant can significantly reduce your potential for getting a flat.
There is one essential for bicycle touring that is not a tangible piece of equipment. It is good “bike-fit”. Handlebars, seat height, and other adjustments have to be right, or you could end up with a sore back or knees after a long ride. Likewise, you’ll want to protect yourself from chafing or getting a sore posterior with a good quality bicycle seat (a saddle) that is neither too soft or too hard. Make sure that bike-fit adjustments and equipment requirements are worked out well before the departure date. Never try any new seats, pedals, shoes, or bike adjustments just before leaving, or you could end up with an unpleasant surprise in the middle of your trip. For more on this subject, see “Good Bike-Fit for Comfortable & Pain-free Cycling“.
Packing for lightweight bicycle touring
The best way to pack for bicycle touring it to concentrate on being an absolute minimalist. For example, you may want to repackage your toiletries into smaller containers. When deciding what to bring, remember that you should keep your cycling clothes fresh by washing them everyday at the end of your ride. This really cuts down on what you have to pack.
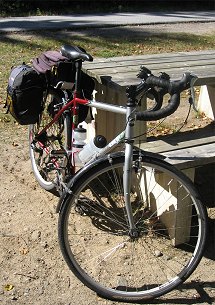
The author’s bike on tour. All the clothes for two people for a five day ride are packed in the two back pannier bags.
You will also need some street clothes that you’ll change into after you have taken a shower at the end of a day’s ride. You may want to bring pants with zip-off legs which can double for both shorts and long pants. Throw in one or two shirts, some socks and underwear, along with a bathing suit, and you’re almost packed. If your street clothes are made of synthetic material, they too will be easy to wash and dry (although you will not have to wash them nearly as often as your cycling clothes).
Extra footwear will be an indispensable item if you are riding with super rigid cycling shoes that are difficult to walk in. Even if you are riding with regular sports shoes which can be used for walking, your feet will still appreciate getting into fresh footwear after a hot day of pedaling. A pair of lightweight sandals would do the trick, as would amphibious (water) shoes. These look like stylish running shoes, but they are light and easy to collapse for packing.
Washing your clothes
It’s worth emphasizing that the minimalist approach for packing for lightweight touring is dependent on your getting into the habit of washing your cycling clothes everyday. This is especially important with cycling shorts that have an extra layer of padding called a chamois, because they are designed to be worn without underwear (the seams in underwear can cause irritation and chafing). Simply add a bit liquid laundry soap (shampoo if you have nothing else) to a sink full of water, and agitate your shorts, jersey and socks in it for a minute or two. Repeat this process with clear water to rinse your clothes. Wring them out, hang to dry, and you’re done.
Sportswear made of synthetic material dries remarkably fast, so everything should be ready for the next morning. You can also speed up the process by laying out the damp clothes on a towel, rolling them up together, and then applying your weight on the roll by walking on it with your bare feet. The towel will absorb a great deal of moisture from the clothes, and they will probably be completely dry in a couple of hours.
Other essentials
Needless to say, bring the usual items that you would normally carry when going out for local rides. This includes a portable air pump, a patch repair kit, tire levers, an extra tube, and a small bicycle multi-tool which incorporates folding hex keys and a screw driver. Many cyclists often bring a few extras when touring, including a chain tool, a chain replacement link, a spoke wrench, a few zip ties, some spare braze-on bolts, a small container of chain lubricant and a rag (the last two items in resealable zip lock sandwich bags).
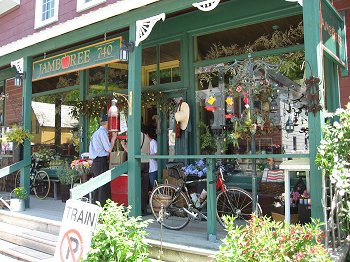
A boutique in Wakefield. If you do buy something and have no place to carry it in your panniers, go to the nearest post office, and mail it to yourself. (Many post offices sell the necessary envelopes & boxes.)
The list of essential items doesn’t stop here. Don’t forget a to bring a good U-lock, and make sure your bike is equipped with a minimum of two water bottle cages (with bottles). Even if you plan to do your riding during daylight hours, pack a set of compact LED lights in case you get caught out after dark. You also need plenty of sunscreen and a small first aid kit. You should never go touring without carrying a good supply of granola bars or other high carbohydrate snacks to replenish your energy levels. In addition to the liquid laundry soap (not detergent), bring a nylon cord that can be rigged as a clothesline for drying clothes in your room. Plastic bags in various sizes (including small zip-lock ones) are always handy to organize your packing and help keep things dry.
Electronics
In terms of electronics, much has changed in the few years since this article was originally written. Today, the ubiquitous smartphone provides for a communication device, a camera, and GPS mapping, all in one compact unit. The ability of these phones to run a multitude of apps and to browse the web can be particularly useful for cyclists who want to read their email, do route planning on the fly, book hotels or B&Bs, check the latest weather forecasts, as well as look up bike touring websites, ferry schedules, or other tourist information about a particular area.
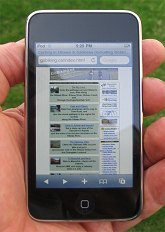
An Ipod Touch displaying the GoBiking.ca web site.
Despite all these advantages, there are a few other electronic items that you may want to bring with you. People who take a lot of photos should consider a compact digital camera (these can now be purchased very cheaply on the used market). They are still more versatile than smartphone cameras, especially when it comes to zoom lens capability.
A dedicated GPS is probably worth bringing. Unlike a few years ago, there is now a wide selection of bicycle GPS units that display actual navigation maps, and most can be loaded with pre-planned routes that will provide turn-by-turn directions when riding your bike. This isn’t so important when out on country roads, but it can be a real godsend when trying to cycle through a large city that you’re unfamiliar with. (Note – if your GPS unit does not come with detailed maps, you can load them free from Openstreet maps. It’s a little complicated, but worth the effort.)
The main advantage of a dedicated bicycle GPS is that it has much better battery life than a smartphone, and it will eliminate the need to drain the phone’s battery while keeping track of your progress on the navigation map. Moreover, dedicated GPS units are better able to handle wet conditions, are usually easier to interface with external sensors (cadence, heart rate monitors), and will not eat up any of your smartphone’s data plan.
Regardless of what electronic devices you decide to bring, don’t forget the necessary chargers or USB power adapters.
Cycling in the rain
You’ll obviously want to schedule your bicycle touring for a period when the forecast calls for nice weather, but there will be times when you will have to ride in the rain. If it’s warm enough, you can accept to get wet, and simply continue cycling in your regular cycling clothes. In very hot weather, you may find that cycling in light rain provides a nice break from all the heat. Otherwise, you’ll have to wear some sort of waterproof jacket. Inexpensive ones that are not breathable often have large vent across the back and openings under the arms. More expensive models will be made of breathable waterproof material (such as Gore-Tex). In reality you are probably going to sweat in both types of jackets (most of these breathable jackets don’t allow water vapour to escape fast enough when cycling).
You may arrive at your destination wet from the rain (or sweat), but everything will soon be okay once you take a shower and get into some dry clothes. This means that keeping the contents of the panniers dry becomes all important when it is raining. If your panniers do not come with a rain cover, you will have to use plastic bags to keep everything dry.
Bicycle fenders is another rain related item that is popular with some cyclists. Plastic fenders are inexpensive and lightweight, but they do affect a bike’s performance by adding to its wind resistance. Fenders will keep your tires from spraying dirty road water onto you, your bike, and its components. They will also help keep you dry if, after having waited for the rain to stop, you go cycling on wet roads.
Affordable Accommodations
Finding a suitable place to stay is an important aspect of lightweight bicycle touring. Fancy B&Bs, country inns, and major hotels that are located in the middle of popular tourist spots will be the most expensive. Standard B&Bs and motels that are slightly removed from high-demand areas will be more affordable. If you really want to keep costs low, consider using the network of hostels which exist across Canada. While there is no age limit for anyone using these facilities, their target group are people 18 to 35 years old. Another affordable possibility are universities that make rooms in student residences available to the public during the summer. Examples include Queen’s University in Kingston and Brock University in the Niagara Peninsula (see links below for more examples).
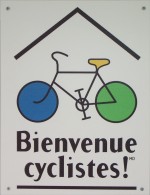
Hotels, inns, and B&Bs that cater to cyclists in Quebec display this sign.
Epilogue
As you can see from reading this article, there is not much standing in the way of the average cyclist from making the jump from going out for local rides to doing some lightweight touring. Pack up your panniers, reserve a room at a B&B in a nearby destination, and start off with a weekend get away. From here, it shouldn’t take long before you are seeking out new adventures with multi-day tours.
What are you waiting for?
Michael McGoldrick,
March, 2010
[feather_share]
![]()